

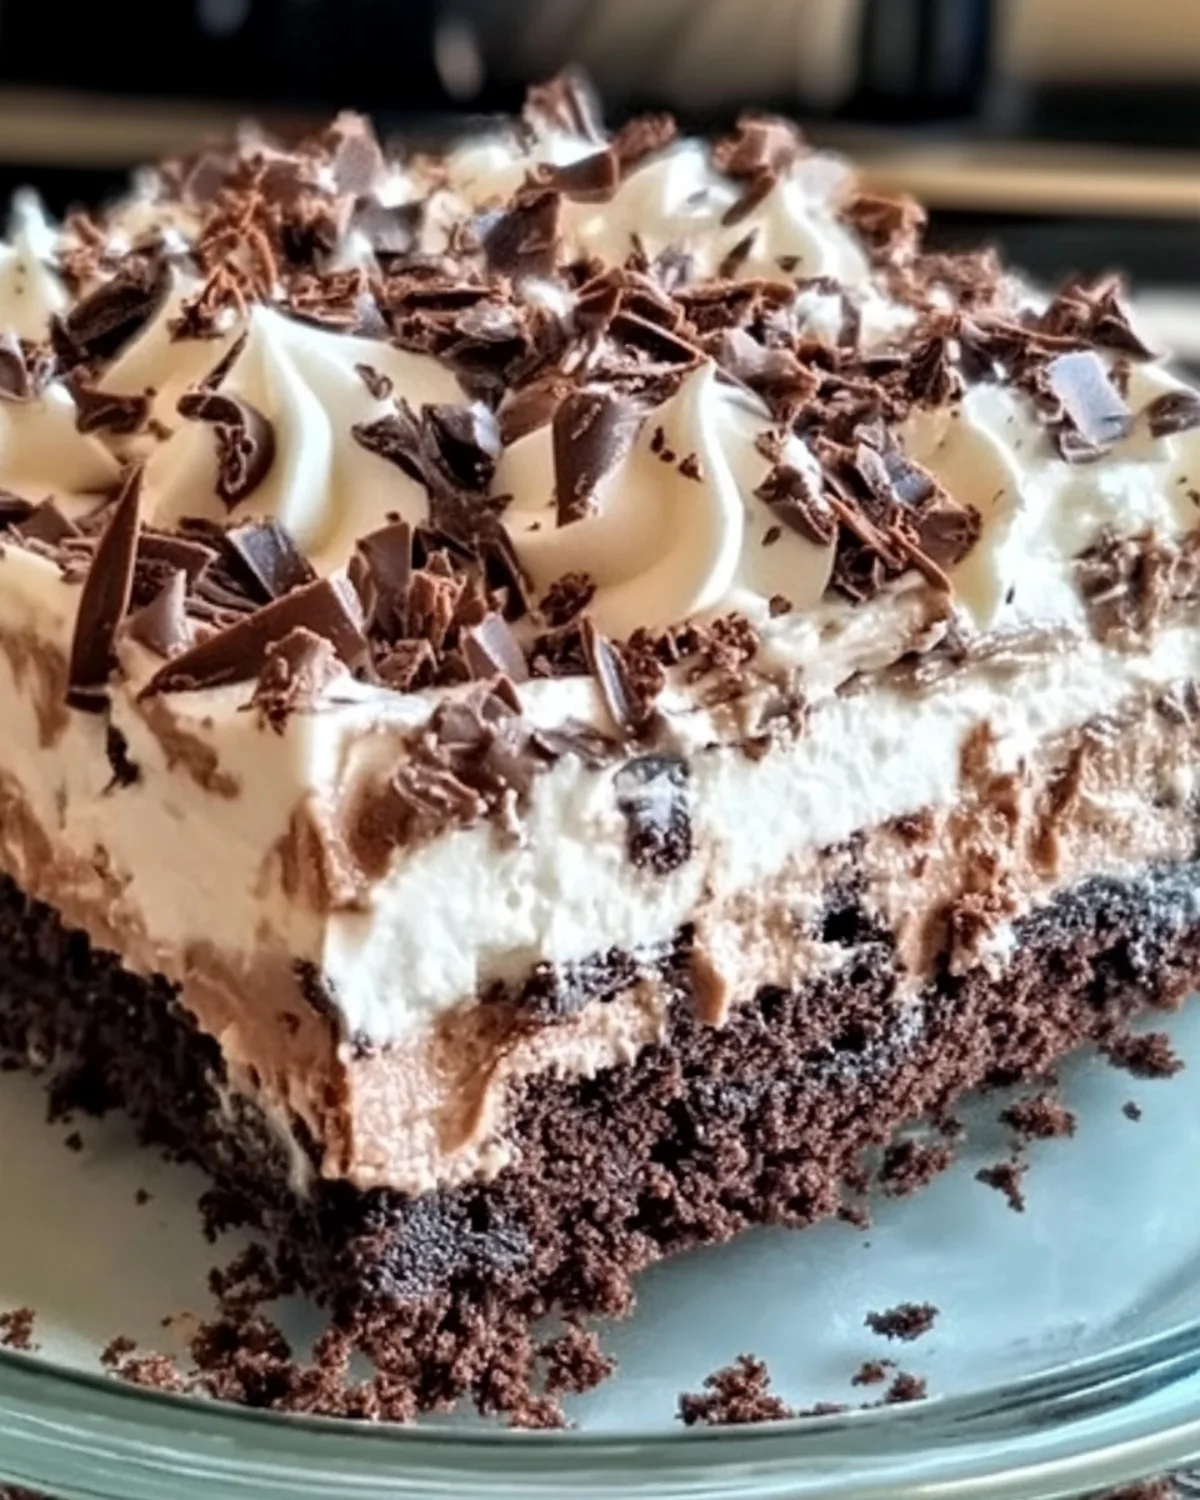
When it comes to desserts, few things are as indulgent and satisfying as a slice of brownie cake. But what if you could take that delicious brownie experience and turn it into a chilled treat that’s perfect for warm weather or any occasion? Enter the Brownie Refrigerator Cake! This delightful dessert combines the rich, fudgy goodness of brownies with a creamy layer of sweetened cream cheese and whipped topping, all drizzled with chocolate syrup. It’s a treat that’s not only easy to make but also perfect for sharing at parties, potlucks, or family gatherings.
Let’s explore the delicious layers of this recipe, from the brownie base to the luscious cream cheese topping, and see why this chilled dessert is destined to be a favorite.
Ingredients for Brownie Refrigerator Cake
Before we get started, let’s gather all the ingredients you’ll need to create this scrumptious Brownie Refrigerator Cake. Here’s the complete list:
- 1 box (18 oz) brownie mix (plus ingredients required to prepare)
- 1 (8 oz) package of cream cheese, softened
- 1/2 cup powdered sugar
- 1 teaspoon vanilla extract
- 2 cups whipped topping (like Cool Whip)
- 1 cup chocolate syrup
- Chocolate shavings or sprinkles for garnish (optional)
These simple ingredients come together to create a dessert that’s sure to impress! Now, let’s break down the steps for making this delightful chilled cake.
Directions to Prepare Brownie Refrigerator Cake
Step 1: Prepare the Brownies
The first step in making your Brownie Refrigerator Cake is to prepare the brownies. Follow these instructions to ensure your brownies turn out perfectly:
-
Preheat the Oven: Begin by preheating your oven according to the instructions on the brownie mix package. Typically, this will be around 350°F (175°C).
-
Mix the Brownie Batter: In a large mixing bowl, combine the brownie mix with the ingredients specified on the package, such as eggs, water, and oil. Stir until well combined, but be careful not to overmix. A few lumps are okay!
-
Bake the Brownies: Pour the brownie batter into a greased 9×13-inch baking pan. Bake according to the package instructions, usually about 25 to 30 minutes. To ensure they’re done, insert a toothpick into the center; if it comes out with a few moist crumbs, they’re perfect!
-
Cool Completely: Once baked, remove the brownies from the oven and allow them to cool completely in the pan. This step is crucial as it prevents the cream cheese layer from melting when spread on top.
Step 2: Make the Cream Cheese Layer
While your brownies are cooling, you can prepare the cream cheese layer that adds a delightful richness to this dessert.
-
Beat the Cream Cheese: In a medium bowl, use an electric mixer to beat the softened cream cheese until it’s smooth and creamy. This will help to create a lump-free mixture.
-
Add the Sweetness: Gradually add the powdered sugar to the cream cheese while mixing. The powdered sugar not only sweetens the mixture but also helps to create a creamy texture.
-
Incorporate Vanilla: Add the vanilla extract to the cream cheese mixture and beat until well combined. This adds a lovely depth of flavor to the cream layer.
-
Fold in the Whipped Topping: Gently fold in the whipped topping (like Cool Whip) until fully incorporated. Be careful not to deflate the whipped topping too much; you want to keep the mixture light and airy.
Step 3: Layer the Cake
Now comes the fun part—layering your chilled brownie cake! Follow these steps for a beautiful presentation:
-
First Layer of Cream Cheese: Once the brownies have cooled completely, spread half of the cream cheese mixture evenly over the top of the brownies. Use a spatula to smooth it out gently, ensuring every corner is covered.
-
Drizzle with Chocolate Syrup: Take half of the chocolate syrup and drizzle it over the cream cheese layer. This adds a delicious chocolatey flavor that complements the creaminess of the cheese.
-
Add Another Layer of Brownies: If you prefer, cut the remaining brownies into squares and add another layer on top of the cream cheese mixture. This step is optional but adds an extra layer of brownie goodness to your cake.
-
Spread Remaining Cream Cheese Mixture: Spread the remaining cream cheese mixture over the new layer of brownies, making sure to cover it evenly.
-
Final Chocolate Drizzle: Drizzle the remaining chocolate syrup over the top layer of cream cheese, creating a visually appealing dessert.
Step 4: Chill
Once you’ve layered everything beautifully, it’s time to chill your creation:
-
Cover the Pan: Use plastic wrap to cover the baking pan securely. This helps prevent any odors from the fridge from seeping into your dessert.
-
Refrigerate: Place the pan in the refrigerator and let it chill for at least 4 hours, or overnight for the best results. This chilling time allows the layers to set and meld together, enhancing the flavor and texture.
Step 5: Serve and Enjoy
After the chilling time is up, it’s time to serve your Brownie Refrigerator Cake!
-
Garnish if Desired: Before serving, you can garnish the top with chocolate shavings or sprinkles for an extra touch of sweetness and decoration.
-
Slice into Squares: Use a sharp knife to slice the cake into squares. This dessert is rich and satisfying, so smaller pieces are usually a good idea!
-
Enjoy: Serve the squares on plates or in dessert cups. Everyone will love this chilled treat, and you’ll likely receive rave reviews!
Nutritional Information
For those keeping an eye on their nutritional intake, here’s a quick breakdown of the nutritional values per serving (1 square):
- Calories: 350 kcal
- Total Fat: 18g
- Saturated Fat: 10g
- Cholesterol: 50mg
- Sodium: 200mg
- Total Carbohydrates: 42g
- Dietary Fiber: 1g
- Sugars: 24g
- Protein: 4g
This dessert is rich and indulgent, so it’s perfect for special occasions or when you just want to treat yourself!
Tips for Making the Best Brownie Refrigerator Cake
Creating the perfect Brownie Refrigerator Cake can be a breeze with these helpful tips:
1. Use Quality Ingredients
Using high-quality chocolate syrup and cream cheese can significantly enhance the flavor of your dessert. Fresh ingredients make a noticeable difference in taste!
2. Chill for Optimal Flavor
Chilling the cake overnight allows the flavors to develop more fully, creating a richer taste experience. If you can plan ahead, let it sit for as long as possible before serving.
3. Customize Your Layers
Feel free to get creative with your layers! You can add crushed cookies, nuts, or even fresh fruit between the layers to add a unique twist to your Brownie Refrigerator Cake.
4. Adjust Sweetness to Your Liking
If you prefer a less sweet dessert, you can reduce the amount of powdered sugar in the cream cheese layer or use a sugar substitute. Just be sure to taste as you go!
Frequently Asked Questions (FAQs)
Can I Use Homemade Brownies Instead of a Box Mix?
Absolutely! If you have a favorite homemade brownie recipe, feel free to use that instead. Just make sure to bake them in the same size pan (9×13 inches) and allow them to cool completely before adding the cream cheese layer.
How Long Will Leftovers Last?
If you have any leftovers (which is unlikely), store them in an airtight container in the refrigerator. They should be good for about 3-4 days, though the texture may change slightly.
Can I Freeze This Dessert?
Yes, you can freeze Brownie Refrigerator Cake! However, it’s best to freeze it before adding any garnishes. Wrap it tightly in plastic wrap and aluminum foil, and it will last for up to 3 months. When you’re ready to eat, let it thaw in the fridge overnight before serving.
What Are Some Variations I Can Try?
You can easily customize this recipe to suit your tastes! Here are a few ideas:
- Peanut Butter Layer: Add a layer of peanut butter or peanut butter whipped topping for a delightful twist.
- Mint Chocolate: Incorporate mint extract into the cream cheese layer for a refreshing mint chocolate flavor.
- Fruit Topping: Top with fresh strawberries or raspberries for a fruity contrast to the rich brownies.
Conclusion
The Brownie Refrigerator Cake is more than just a dessert; it’s a delightful experience that brings together layers of chocolatey goodness, creamy textures, and irresistible flavors. With simple ingredients and straightforward steps, you can create a chilled treat that will leave everyone wanting more.
Whether you’re preparing for a family gathering, a potluck, or simply craving something sweet, this chilled brownie cake is a fantastic choice. With its rich layers and creamy topping, it’s sure to become a favorite among friends and family alike.
So, what are you waiting for? Gather your ingredients, follow the steps, and indulge in this delicious Brownie Refrigerator Cake. You won’t regret it!
For more mouthwatering dessert ideas, check out these delectable recipes:
Give this recipe a try, and get ready to impress your guests with a dessert that’s as delicious as it is beautiful!
Print
Brownie Refrigerator Cake: A Chilled Delight You’ll Love
- Total Time: 4 hours 45 minutes
- Yield: 12 servings 1x
- Diet: Vegetarian
Description
Indulge in this Brownie Refrigerator Cake, a delightful chilled dessert that combines layers of fudgy brownies, creamy cheese, and rich chocolate syrup. Perfect for any gathering, this treat is sure to impress everyone!
Ingredients
- 1 box (18 oz) brownie mix (plus ingredients required to prepare)
- 1 (8 oz) package of cream cheese, softened
- 1/2 cup powdered sugar
- 1 teaspoon vanilla extract
- 2 cups whipped topping (like Cool Whip)
- 1 cup chocolate syrup
- Chocolate shavings or sprinkles for garnish (optional)
Instructions
- Prepare the Brownies: Bake the brownie mix according to the package instructions in a 9×13 inch pan. Allow them to cool completely in the pan.
- Make the Cream Cheese Layer: In a medium bowl, beat the softened cream cheese until smooth. Add the powdered sugar and vanilla extract, mixing until well combined. Gently fold in the whipped topping until fully incorporated.
- Layer the Cake: Once the brownies have cooled, spread half of the cream cheese mixture over the top of the brownies. Drizzle half of the chocolate syrup over the cream cheese layer.
- Add Another Layer: Add another layer of brownies (you can cut them into squares if desired) on top of the cream cheese layer. Spread the remaining cream cheese mixture over the brownies, then drizzle with the remaining chocolate syrup.
- Chill: Cover the pan with plastic wrap and refrigerate for at least 4 hours, or overnight for best results.
- Serve: Before serving, garnish with chocolate shavings or sprinkles if desired. Slice into squares and enjoy your delicious Brownie Refrigerator Cake!
Notes
- For the best flavor, refrigerate overnight.
- Customize with your favorite toppings, like nuts or berries!
- Prep Time: 15 minutes
- Cook Time: 30 minutes
- Category: Dessert
- Method: No-Bake
- Cuisine: American
Nutrition
- Serving Size: 1 piece
- Calories: 350 kcal
- Sugar: 25g
- Sodium: 200mg
- Fat: 15g
- Saturated Fat: 8g
- Unsaturated Fat: 5g
- Trans Fat: 0g
- Carbohydrates: 48g
- Fiber: 1g
- Protein: 4g
- Cholesterol: 30mg