
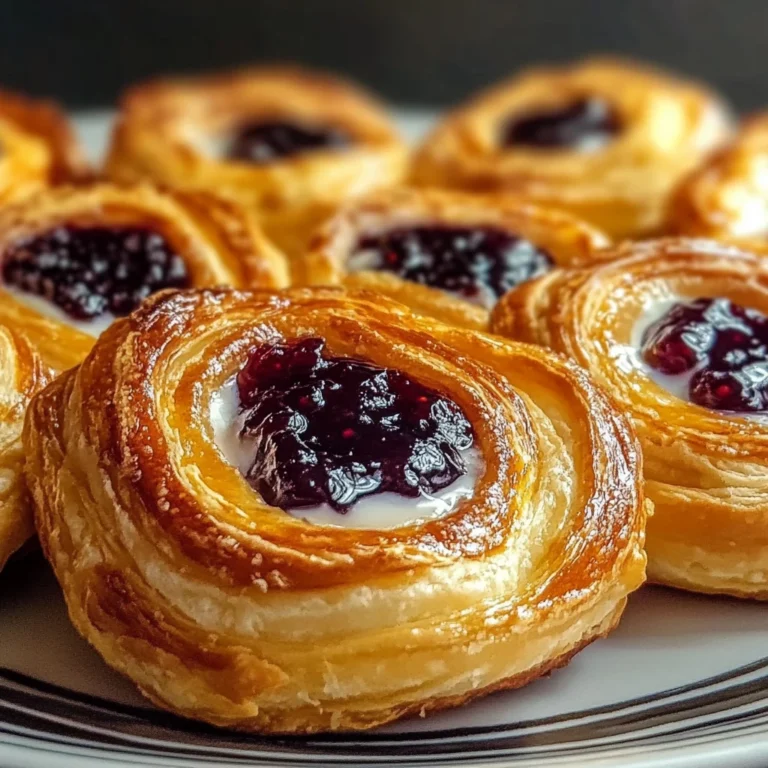
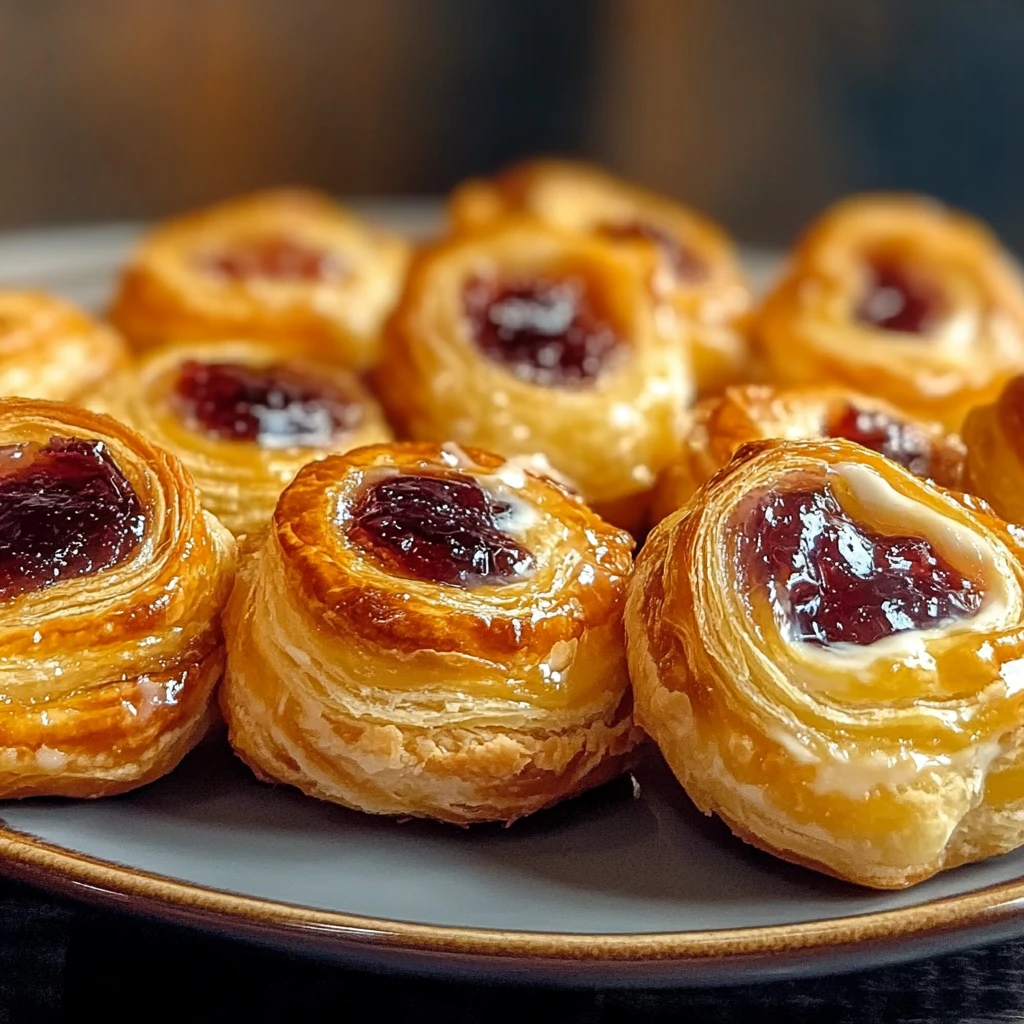
Imagine waking up to the tantalizing aroma of freshly baked, homemade breakfast Danish pastries. The buttery, flaky crust gives way to a luscious, creamy filling, creating a symphony of flavors that will transport your taste buds straight to a cozy European bakery. With just a few simple ingredients and a bit of culinary magic, you can bring this delectable delight right to your own kitchen.
Table of Contents
Elevating Breakfast with Homemade Danish Pastries
Homemade breakfast Danish pastries are a true labor of love, but the end result is well worth the effort. These delightful treats offer a level of freshness and customization that simply can’t be found in store-bought versions. By crafting them yourself, you can tailor the flavors to your personal preferences, experimenting with different fillings and toppings to create a truly unique breakfast experience.
Beyond the sheer pleasure of enjoying a warm, flaky pastry, the process of baking these Danish delights can be incredibly rewarding. There’s something deeply satisfying about rolling out the dough, layering in the butter, and watching the pastries puff up in the oven. And when you take that first bite, revealing the creamy, fruity center, you’ll know that the time and effort was well spent.
Essential Ingredients for Homemade Breakfast Danish Pastries
To create the perfect homemade breakfast Danish pastries, you’ll need a few key ingredients:
- Puff pastry: Store-bought sheets make this recipe quick, giving the pastries that irresistible flaky texture.
- Cream cheese (softened): The creamy base provides richness and a silky center for every Danish.
- Granulated sugar: Adds just enough sweetness to enhance the cream cheese flavor.
- Lemon juice: Fresh citrus lifts the filling, balancing sweetness with brightness.
- Vanilla extract: A dash makes both the filling and glaze extra aromatic and inviting.
- Egg yolk: This enriches the cream cheese mixture and helps set it as it bakes.
- Fruit jam or preserves (raspberry, apricot, or blueberry): The jam brings a juicy, chewy burst of fruitiness — pick your favorite or mix and match!
- Egg (beaten, for egg wash): Brushing the pastry ensures a glossy, golden finish.
- Coarse sugar (optional, for sprinkling): Adds a sparkling, caramelized crunch to the pastry edges.
- Powdered sugar: This is the base for a sweet, drizzly glaze that adds a final bakery touch.
- Milk: Thins the glaze to just the right consistency for drizzling.
- Vanilla extract (for glaze): Ties all the flavors together with warmth and sweetness.
Step-by-Step Guide to Making Homemade Breakfast Danish Pastries
Ready to create your own irresistible homemade breakfast Danish pastries? Follow these simple steps:
- Preheat Oven: Set your oven to 400°F (200°C) and line a baking sheet with parchment paper.
- Mix Cream Cheese Filling: In a medium bowl, beat together the softened cream cheese, granulated sugar, lemon juice, vanilla extract, and egg yolk until smooth and creamy.
- Prepare Puff Pastry: Unfold the thawed puff pastry sheets onto a lightly floured surface. Cut each sheet into 4 squares (for a total of 8 squares). Place them on the prepared baking sheet. Lightly score a half-inch border around each square and prick the centers with a fork.
- Fill Pastries: Spoon about 1 tablespoon of the cream cheese mixture into the center of each pastry square. Top with a spoonful of fruit jam.
- Add Egg Wash: Brush the pastry borders with the beaten egg. Optionally, sprinkle the edges with coarse sugar for a sparkling, caramelized crunch.
- Bake: Bake for 15–18 minutes, or until the pastries are puffed and golden brown. Let them cool on the baking sheet for about five minutes.
- Glaze: In a small bowl, mix powdered sugar, 2–3 tablespoons of milk, and a splash of vanilla extract until smooth. Drizzle the glaze over the cooled pastries.
- Serve: Enjoy these delightful homemade breakfast Danish pastries warm or at room temperature.
Tips for Perfecting Your Homemade Danish Pastries
To achieve the ultimate flaky, buttery texture in your homemade breakfast Danish pastries, follow these tips:
- Work with Very Cold Ingredients: Keeping the dough, butter, and even the work surface chilled helps prevent the butter from melting too quickly, ensuring maximum flakiness.
- Master the Folding Technique: Properly “laminating” the dough by folding and rolling it creates those coveted layers that puff up beautifully in the oven.
- Chill the Dough Frequently: Refrigerate the dough between each folding step to keep the butter firm and the layers distinct.
- Don’t Overfill the Pastries: Too much filling can weigh down the delicate dough and prevent it from rising properly.
- Store Leftover Pastries Properly: Keep them in an airtight container at room temperature for up to 2 days, or freeze them for longer storage.
Variations on the Classic Homemade Danish Pastry
While the classic cream cheese-filled Danish is a beloved breakfast staple, there are endless possibilities for customizing these homemade pastries:
- Fruit Fillings: Experiment with different jams and preserves, such as apple, cherry, or mixed berries.
- Savory Options: Try a savory filling made with cheese and spinach or sautéed mushrooms and onions.
- Nutty Additions: Sprinkle chopped nuts like pecans or almonds over the cream cheese filling.
- Chocolate Swirls: Drizzle melted chocolate over the top of the baked pastries for a decadent twist.
More Related Recipes You Might Enjoy
- Cheesy Bacon Ranch Stuffed Chicken Bombs
- Maple Bacon Pancake Bites
- Crispy Garlic Parm Alfredo Bites
- Mashed Potato Cheese Puffs
Frequently Asked Questions
How can I achieve the best flaky texture in my homemade Danish pastries?
To achieve the best flaky texture in your homemade Danish pastries, it’s essential to focus on the technique of laminating the dough. If you choose to make your puff pastry from scratch, incorporate cold butter into the dough using a folding technique. Roll the dough out into a rectangle, fold it into thirds like a letter, and refrigerate for at least 30 minutes. Repeat this process several times (usually 3-4 folds) to create multiple layers of dough and butter. The steam generated during baking will cause these layers to puff up, resulting in that coveted flaky texture. Additionally, ensure that your ingredients, especially the butter, are very cold to prevent it from melting into the dough before baking.
Can I use alternative sweeteners for the glaze, and how will it affect the flavor?
Yes, you can use alternative sweeteners for the glaze, such as honey, maple syrup, or agave nectar. Keep in mind that the flavor will vary depending on the sweetener used. For instance, honey will add a floral note and a slightly richer flavor, while maple syrup will impart a warm, earthy sweetness. If using a granulated sweetener like stevia or erythritol, be sure to check the conversion ratios, as these can be sweeter than sugar. The consistency of the glaze may also change based on the sweetener, so you may need to adjust the amount of milk to achieve the desired drizzling texture.
What is the best way to store leftover Danish pastries to maintain freshness?
To store leftover Danish pastries and maintain their freshness, place them in an airtight container at room temperature for up to 2 days. If you want to keep them for a longer period, you can refrigerate them for up to a week, though this may cause them to lose some flakiness. For even longer storage, consider freezing them. Wrap individual pastries tightly in plastic wrap and then place them in a freezer bag. When ready to eat, thaw in the refrigerator overnight and reheat in a toaster oven or conventional oven to restore some crispiness. Avoid microwaving, as this can make the pastries soggy.
Can I mix different fillings in one batch of Danish pastries, and how should I do it?
Yes, you can mix different fillings in one batch of Danish pastries! To do this effectively, prepare a variety of fillings—such as cream cheese with different fruit jams or a mix of sweet and savory options—before you start assembling the pastries. When filling each pastry, simply spoon a small amount of each filling into the center of the dough, ensuring not to overfill them. This allows for a delightful assortment in each batch, and you can label them if you like. Just be mindful of balancing flavors; for example, pairing a tart jam with a rich cream cheese filling can create a lovely contrast.
Enjoy the irresistible homemade goodness of these Homemade Breakfast Danish Pastries! Share your creations and let us know your favorite flavor combinations.
Looking for more visual inspiration? Follow me on Pinterest, where I share new recipes, dinner tips, and behind-the-scenes kitchen moments every week. Buon appetito!
Print
Create Irresistible Homemade Breakfast Danish Pastries Today!
- Total Time: 48 minutes
- Yield: 8 pastries 1x
- Diet: Vegetarian
Description
Homemade breakfast Danish pastries are a delightful treat with a flaky crust and creamy filling.
Ingredients
- 1 package puff pastry
- 1 (8 ounce) package cream cheese, softened
- 1/4 cup granulated sugar
- 1 tablespoon lemon juice
- 1 teaspoon vanilla extract
- 1 egg yolk
- 1/4 cup fruit jam or preserves (raspberry, apricot, or blueberry)
- 1 egg, beaten (for egg wash)
- 1 tablespoon coarse sugar (optional, for sprinkling)
- 1 cup powdered sugar
- 2 tablespoon milk
- 1/2 teaspoon vanilla extract (for glaze)
Instructions
1. Preheat Oven: Set your oven to 400°F and line a baking sheet with parchment paper.
2. Mix Cream Cheese Filling: In a medium bowl, beat together the softened cream cheese, granulated sugar, lemon juice, vanilla extract, and egg yolk until smooth and creamy.
3. Prepare Puff Pastry: Unfold the thawed puff pastry sheets onto a lightly floured surface. Cut each sheet into 4 squares (for a total of 8 squares). Place them on the prepared baking sheet. Lightly score a half-inch border around each square and prick the centers with a fork.
4. Fill Pastries: Spoon about 1 tablespoon of the cream cheese mixture into the center of each pastry square. Top with a spoonful of fruit jam.
5. Add Egg Wash: Brush the pastry borders with the beaten egg. Optionally, sprinkle the edges with coarse sugar for a sparkling, caramelized crunch.
6. Bake: Bake for 15–18 minutes, or until the pastries are puffed and golden brown. Let them cool on the baking sheet for about five minutes.
7. Glaze: In a small bowl, mix powdered sugar, 2 tablespoon of milk, and a splash of vanilla extract until smooth. Drizzle the glaze over the cooled pastries.
8. Serve: Enjoy these delightful homemade breakfast Danish pastries warm or at room temperature.
Notes
To achieve maximum flakiness, work with very cold ingredients and chill the dough frequently.
- Prep Time: 30 minutes
- Cook Time: 18 minutes
- Category: Breakfast
- Method: Baking
- Cuisine: European
Nutrition
- Serving Size: 1 pastry
- Calories: 250
- Sugar: 10g
- Sodium: 150mg
- Fat: 15g
- Saturated Fat: 8g
- Unsaturated Fat: 5g
- Trans Fat: 0g
- Carbohydrates: 30g
- Fiber: 0g
- Protein: 3g
- Cholesterol: 50mg