
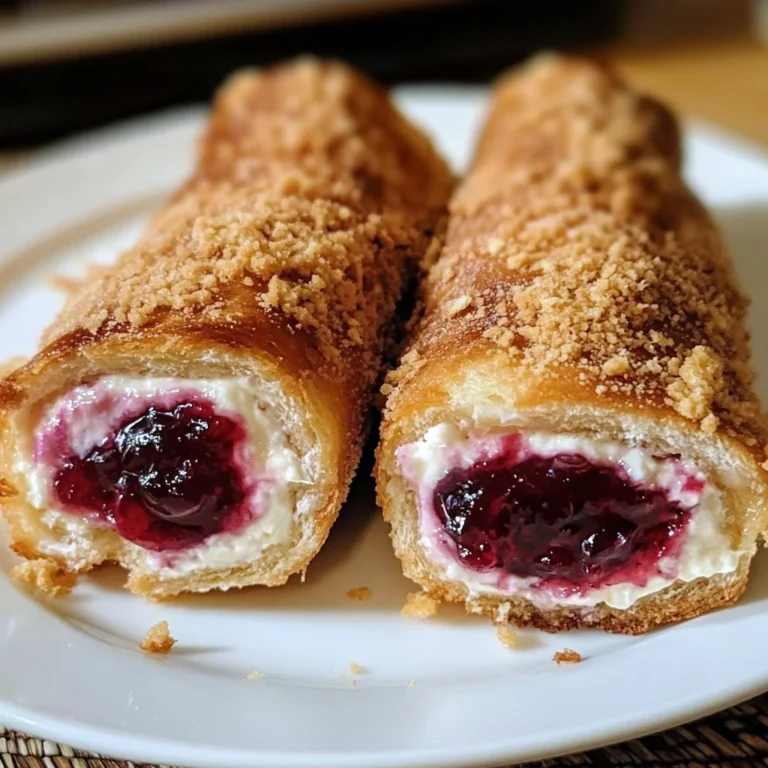
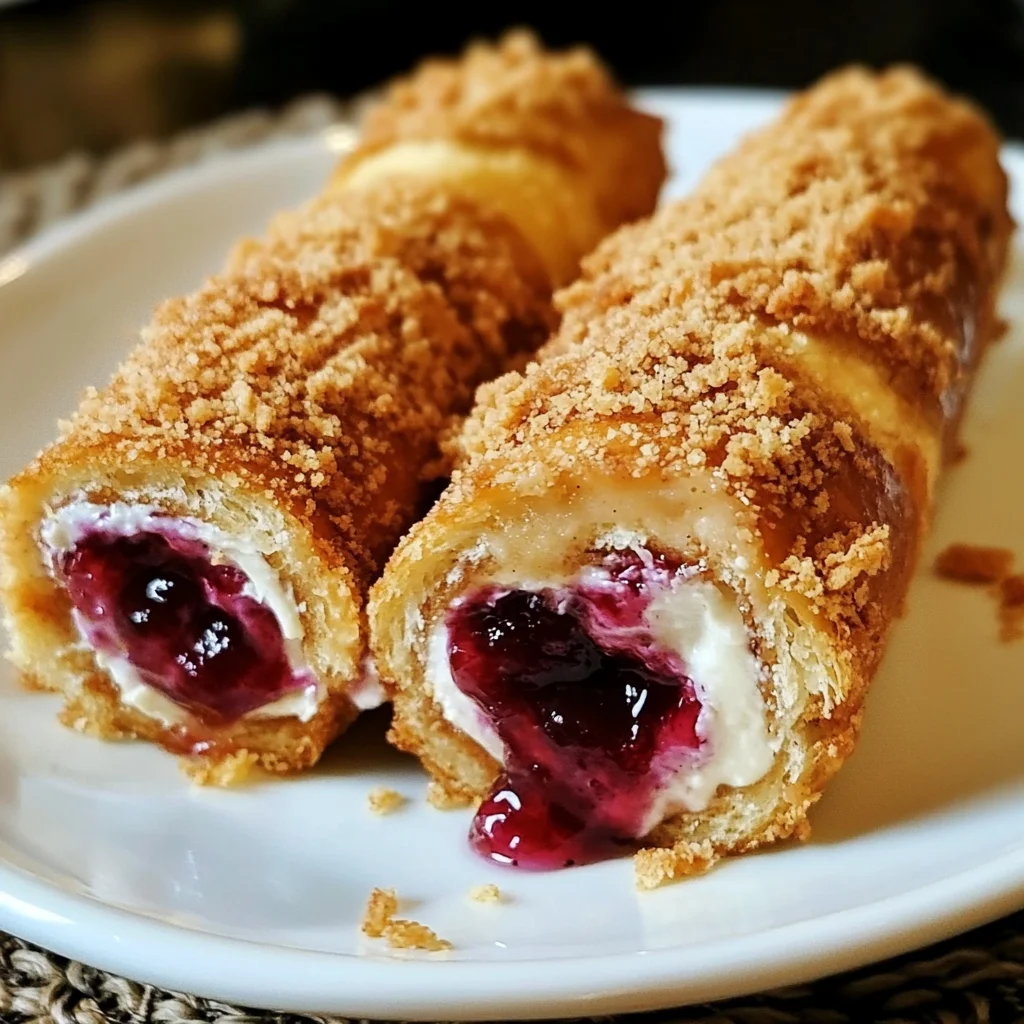
Prepare to embark on a delightful culinary adventure with these Crispy Fried Peanut Butter & Jelly Cheesecake Roll-Ups! This unique twist on a classic flavor combination will have your taste buds dancing with joy. Imagine the nostalgic pairing of peanut butter and jelly, elevated with a creamy cheesecake filling and a delightful crunch from the fried exterior. It’s a dessert that will transport you back to your childhood, while also offering a sophisticated and indulgent experience.
Ingredients Overview
To create these irresistible roll-ups, you’ll need a few simple ingredients. The bread slices provide the foundation, which you’ll flatten with a rolling pin to make them more pliable for rolling. Creamy peanut butter and your favorite jelly or jam will add the classic PB&J flavor. The cream cheese and powdered sugar mixture introduces a delightful cheesecake element, while the beaten egg and crushed graham crackers create a crispy, golden-brown coating when fried. Feel free to experiment with different types of bread, such as whole wheat or even gluten-free options, and try various jam flavors to suit your personal preferences.
Equipment and Preparation
To get started, you’ll need a few essential kitchen tools. A rolling pin is crucial for flattening the bread slices, and a skillet or frying pan will be used to fry the roll-ups to perfection. Prepare your workspace by clearing a clean, flat surface to assemble the roll-ups. Have all your ingredients and tools readily available to make the process seamless. Remember to dispose of any used oil properly and clean up your workspace when you’re done to keep your kitchen tidy.
Step-by-Step Instructions
Flattening the Bread
Begin by removing the crusts from the bread slices. Using a rolling pin, gently flatten each slice to create a thin, pliable base for rolling. This step is essential to ensure the roll-ups hold their shape and don’t tear during the assembly process.
Spreading and Rolling
In a small bowl, mix the softened cream cheese and powdered sugar until well combined. Spread a layer of peanut butter on one end of the flattened bread slice, followed by a generous dollop of jelly or jam in the center. Finally, add a layer of the cream cheese mixture to the opposite end. Carefully roll the bread slice tightly, starting from the peanut butter end and finishing with the cream cheese end.
Coating the Roll-Ups
Prepare a shallow bowl with the beaten egg and another bowl with the crushed graham crackers. Dip each rolled-up slice into the egg mixture, ensuring it’s fully coated. Then, roll the egg-coated roll-up in the crushed graham crackers, pressing gently to help the crumbs adhere.
Frying the Roll-Ups
In a skillet or frying pan, heat a generous amount of oil over medium-high heat. Once the oil is hot, carefully add the coated roll-ups and fry them until they’re golden brown on all sides, taking care to flip them regularly for even cooking. Remove the crispy roll-ups from the oil and transfer them to a paper towel-lined plate to drain any excess oil.
Serving Suggestions
Allow the Crispy Fried Peanut Butter & Jelly Cheesecake Roll-Ups to cool slightly, then dust them with a sprinkle of powdered sugar, if desired. Serve these delightful treats warm, as they pair perfectly with a scoop of vanilla ice cream or a dollop of whipped cream. The contrast of the crispy exterior and the creamy, indulgent interior makes for an unforgettable dessert experience.
Tips for Perfecting Your Roll-Ups
To ensure your Crispy Fried Peanut Butter & Jelly Cheesecake Roll-Ups turn out perfectly, here are a few tips to keep in mind:
- Adjust the frying time to achieve your desired level of crispness. Fry for a shorter duration if you prefer a softer, more pillowy texture, or for longer if you want a crunchier exterior.
- Get creative with your fillings! Try different types of nut butters, such as almond or cashew, and experiment with various jams or preserves to find your favorite flavor combinations.
- For a healthier twist, consider baking the roll-ups instead of frying them. The end result may be slightly less crispy, but still delicious.
- If you have any leftover roll-ups, store them in an airtight container in the refrigerator for up to 3 days. Reheat them in the oven or air fryer to restore the crispness.
Nutritional Information
While these Crispy Fried Peanut Butter & Jelly Cheesecake Roll-Ups are undoubtedly a decadent treat, they can be enjoyed as part of a balanced diet. Each serving (one roll-up) contains approximately 250 calories, with a mix of carbohydrates, protein, and fat. The peanut butter and cream cheese provide a good source of healthy fats, while the jelly adds natural sweetness. To make a healthier version, you can use whole-wheat bread, reduce the amount of cream cheese, and opt for a lower-sugar jam. Remember, moderation is key when indulging in these delicious roll-ups.
More Related Recipes You Might Enjoy
- Peanut Butter Cup Dump Cake
- Amish Peanut Butter Cream Pie
- Cinnamon Roll French Toast Roll-Ups
- Blueberry Cream Cheese Egg Rolls
FAQs about Peanut Butter Jelly Cheesecake Roll-Ups
1. What ingredients do I need to make Peanut Butter Jelly Cheesecake Roll-Ups?
To make Peanut Butter Jelly Cheesecake Roll-Ups, you will need the following ingredients: cream cheese, peanut butter, powdered sugar, vanilla extract, tortillas (or flatbreads), and your choice of jelly or jam (such as grape or strawberry). Optional toppings may include crushed nuts or chocolate chips for added flavor.
2. How do I prepare the Peanut Butter Jelly Cheesecake Roll-Ups?
To prepare the roll-ups, start by mixing the cream cheese, peanut butter, powdered sugar, and vanilla extract until smooth. Spread this mixture evenly over the tortilla, then add a layer of jelly or jam. Roll the tortilla tightly, slice it into pinwheels, and serve. You can chill them for a bit before serving to enhance the flavors and make them easier to slice.
3. Can I make Peanut Butter Jelly Cheesecake Roll-Ups in advance?
Yes, you can prepare Peanut Butter Jelly Cheesecake Roll-Ups in advance! After rolling and slicing them, store the roll-ups in an airtight container in the refrigerator. They can be made a few hours ahead of time or even the night before. Just be sure to serve them chilled for the best taste.
4. Are there variations to this recipe?
Absolutely! There are many variations you can try. For example, you can substitute almond butter or cashew butter for peanut butter, use different flavored cream cheeses, or try various jellies and jams. Additionally, you can add sliced fruits like bananas or strawberries inside the roll-ups for extra flavor and nutrition.
Conclusion
Indulge in the ultimate fusion of flavors with these Crispy Fried Peanut Butter & Jelly Cheesecake Roll-Ups. The combination of creamy peanut butter, sweet jelly, and velvety cheesecake, all wrapped in a crispy, golden-brown exterior, is a true culinary masterpiece. Whether you’re satisfying a nostalgic craving or looking to impress your guests, these roll-ups are sure to become a new favorite in your recipe repertoire. So, grab your apron, gather your ingredients, and get ready to embark on a delightful journey of taste and texture!
Print
Crispy Peanut Butter & Jelly Cheesecake Roll-Ups Recipe
- Total Time: 25 minutes
- Yield: 4 roll-ups 1x
- Diet: Vegetarian
Description
Prepare to embark on a delightful culinary adventure with these Crispy Fried Peanut Butter & Jelly Cheesecake Roll-Ups! This unique twist on a classic flavor combination will have your taste buds dancing with joy. Imagine the nostalgic pairing of peanut butter and jelly, elevated with a creamy cheesecake filling and a delightful crunch from the fried exterior. It’s a dessert that will transport you back to your childhood, while also offering a sophisticated and indulgent experience.
Ingredients
- 4 slices of bread (white, whole wheat, or gluten-free)
- 1/4 cup creamy peanut butter
- 1/4 cup jelly or jam (your favorite flavor)
- 4 oz cream cheese, softened
- 1/4 cup powdered sugar
- 1 egg, beaten
- 1/2 cup crushed graham crackers
- Oil for frying
Instructions
Flattening the Bread
Begin by removing the crusts from the bread slices. Using a rolling pin, gently flatten each slice to create a thin, pliable base for rolling.
Spreading and Rolling
In a small bowl, mix the softened cream cheese and powdered sugar until well combined. Spread a layer of peanut butter on one end of the flattened bread slice, followed by a generous dollop of jelly or jam in the center. Finally, add a layer of the cream cheese mixture to the opposite end. Carefully roll the bread slice tightly, starting from the peanut butter end and finishing with the cream cheese end.
Coating the Roll-Ups
Prepare a shallow bowl with the beaten egg and another bowl with the crushed graham crackers. Dip each rolled-up slice into the egg mixture, ensuring it’s fully coated. Then, roll the egg-coated roll-up in the crushed graham crackers, pressing gently to help the crumbs adhere.
Frying the Roll-Ups
In a skillet or frying pan, heat a generous amount of oil over medium-high heat. Once the oil is hot, carefully add the coated roll-ups and fry them until they’re golden brown on all sides, flipping them regularly for even cooking. Remove the crispy roll-ups from the oil and transfer them to a paper towel-lined plate to drain any excess oil.
Serving Suggestions
Allow the Crispy Fried Peanut Butter & Jelly Cheesecake Roll-Ups to cool slightly, then dust them with a sprinkle of powdered sugar, if desired. Serve these delightful treats warm, as they pair perfectly with a scoop of vanilla ice cream or a dollop of whipped cream.
Notes
- Fry for a shorter duration for a softer texture, or longer for a crunchier exterior.
- Experiment with different nut butters and jams to find your favorite flavor combinations.
- For a healthier twist, consider baking the roll-ups instead of frying them.
- Store leftovers in an airtight container in the refrigerator for up to 3 days, and reheat in the oven or air fryer to restore crispness.
- Prep Time: 15 minutes
- Cook Time: 10 minutes
- Category: Dessert
- Method: Frying
- Cuisine: American
Nutrition
- Serving Size: 1 roll-up
- Calories: 250 kcal
- Sugar: 12g
- Sodium: 180mg
- Fat: 15g
- Saturated Fat: 4g
- Unsaturated Fat: 10g
- Trans Fat: 0g
- Carbohydrates: 23g
- Fiber: 1g
- Protein: 5g
- Cholesterol: 45mg