

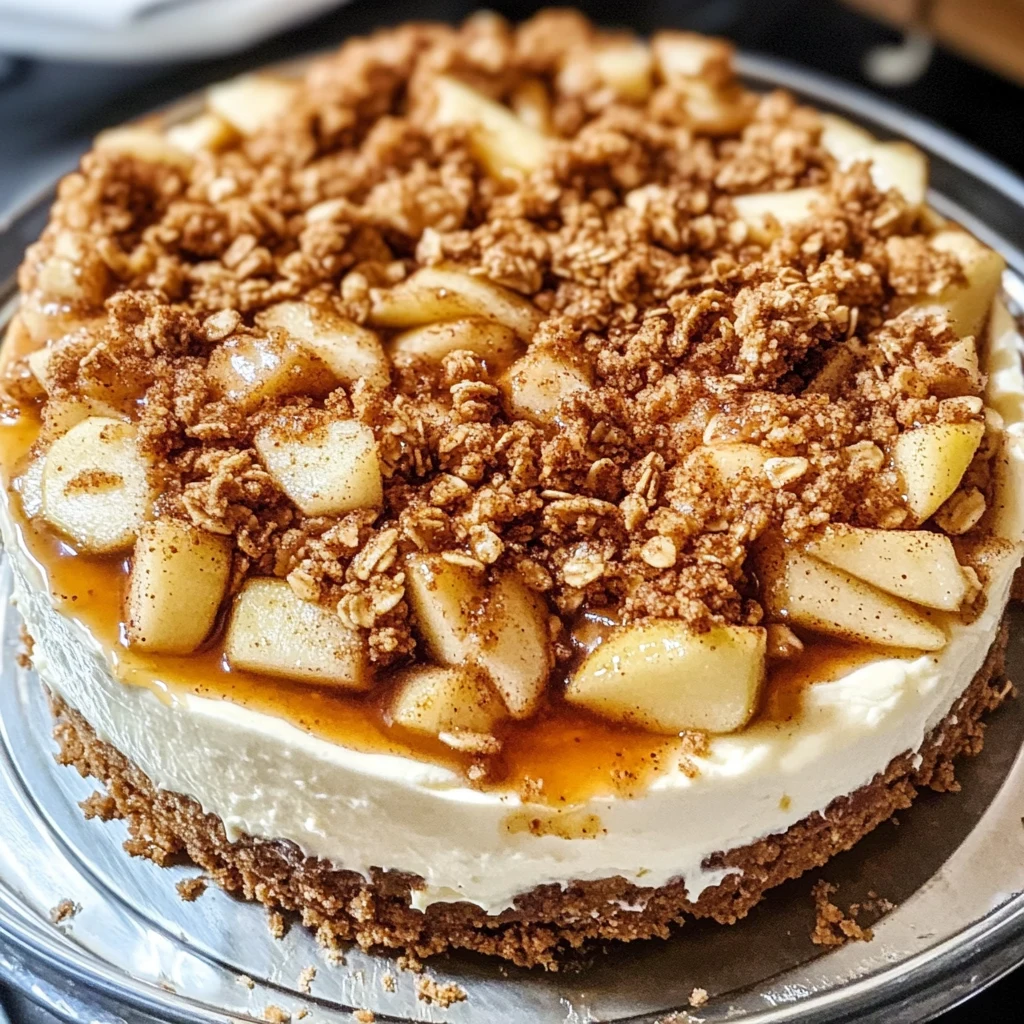
Get ready to embark on a delectable journey as we dive into the world of Apple Crisp Cheesecake. This irresistible dessert combines the rich, creamy indulgence of a classic cheesecake with the warm, comforting flavors of a homemade apple crisp. Whether you’re a cheesecake aficionado or simply crave a cozy, indulgent treat, this recipe is sure to delight your taste buds and leave you craving more.
Table of Contents
The Origins and Evolution of Apple Crisp Cheesecake
Cheesecake has long been a beloved dessert, with its roots tracing back to ancient Greece. Over the centuries, it has evolved, with creative cooks and bakers experimenting with various flavors and ingredients. The classic New York-style cheesecake, with its dense, creamy texture, has become a staple in many households. Meanwhile, the humble apple crisp has been a comforting favorite, showcasing the natural sweetness of apples beneath a crunchy, buttery topping.
The genius who first combined these two delightful desserts is often debated, but one thing is certain: the resulting Apple Crisp Cheesecake is a true masterpiece. By layering a creamy cheesecake base with sliced apples and a delectable crisp topping, this recipe delivers a harmonious blend of flavors and textures that satisfy both the indulgent and the comforting cravings of dessert lovers.
Essential Ingredients for Apple Crisp Cheesecake
To create this captivating Apple Crisp Cheesecake, you’ll need a carefully curated list of ingredients:
- 24 oz cream cheese, softened – The foundation of a rich, creamy cheesecake.
- 1 cup granulated sugar – Sweetens the cheesecake batter and balances the tangy cream cheese.
- 1/4 cup all-purpose flour – Helps to stabilize the cheesecake and prevent cracking.
- 1 tsp vanilla extract – Adds a warm, fragrant note to the cheesecake.
- 4 large eggs – Provides structure and a smooth, velvety texture to the cheesecake.
- 3 cups peeled and sliced Granny Smith apples – Tart and crisp apples that hold their shape well during baking.
- 1 cup old-fashioned oats – The base of the crunchy topping.
- 1/2 cup brown sugar – Adds a caramelized sweetness to the crisp topping.
- 1/2 cup all-purpose flour – Binds the crisp topping together.
- 1/2 cup unsalted butter, cubed – Provides richness and a melt-in-your-mouth texture to the crisp topping.
- 1 tsp ground cinnamon – Enhances the warm, cozy flavors of the apple crisp.
By carefully balancing the creamy cheesecake, the tart apples, and the sweet, crunchy topping, this Apple Crisp Cheesecake recipe delivers a harmonious and indulgent dessert experience.
Step-by-Step Instructions to Make Apple Crisp Cheesecake
Ready to bring this delightful Apple Crisp Cheesecake to life? Follow these easy-to-follow steps:
- Preheat the Oven: Set your oven to 350°F (175°C) and grease a 9-inch springform pan to prepare for the cheesecake.
- Prepare the Cheesecake Batter: In a large bowl, beat the cream cheese until it’s smooth and creamy. Add the granulated sugar, flour, and vanilla extract, mixing until well combined. Then, one at a time, beat in the eggs, making sure to incorporate each one fully before adding the next.
- Layer the Apples: Spread the sliced Granny Smith apples evenly in the bottom of the prepared springform pan. Carefully pour the cheesecake batter over the apples, smoothing the top with a spatula.
- Make the Crisp Topping: In a separate bowl, combine the old-fashioned oats, brown sugar, flour, cubed butter, and ground cinnamon. Use your fingers or a fork to mix the ingredients until they form a crumbly, streusel-like topping.
- Add the Topping: Evenly sprinkle the crisp topping over the cheesecake batter, ensuring it covers the entire surface.
- Bake to Perfection: Place the filled springform pan in the preheated oven and bake for 50-60 minutes, or until the top is golden brown and a toothpick inserted into the center comes out clean.
- Cool and Serve: Allow the Apple Crisp Cheesecake to cool to room temperature, then refrigerate it for at least 4 hours (or overnight) before slicing and serving. Savor each delectable bite of this indulgent dessert!
Tips for Perfecting Your Apple Crisp Cheesecake
To ensure your Apple Crisp Cheesecake turns out perfectly every time, consider these helpful tips:
- Cream the Cheese Thoroughly: Take the time to beat the cream cheese until it’s silky smooth, as this will contribute to the creamy texture of the cheesecake.
- Layer the Apples Evenly: Arrange the sliced apples in a single, even layer on the bottom of the pan to ensure they bake consistently and complement the cheesecake layer.
- Crumble the Topping: Use your fingers or a fork to create a delightfully crumbly, streusel-like topping that will bake up crisp and golden brown.
- Don’t Overbake: Keep a close eye on the cheesecake during the baking process, as overbaking can lead to a dry, cracked texture. Remove it from the oven when the center is still slightly jiggly.
- Chill Thoroughly: Allowing the Apple Crisp Cheesecake to chill in the refrigerator for several hours or overnight is crucial for the cheesecake to set properly and develop its signature creamy texture.
Variations and Customizations for Apple Crisp Cheesecake
While the classic Apple Crisp Cheesecake is a true delight, there are endless ways to customize this recipe to suit your personal preferences:
- Apple Variety: Experiment with different types of apples, such as Honeycrisp, Fuji, or Braeburn, to add unique flavors and textures to your cheesecake.
- Nut Addition: Sprinkle chopped walnuts, pecans, or almonds into the crisp topping for an extra layer of crunch and nutty goodness.
- Spice It Up: Add a pinch of nutmeg, allspice, or ginger to the crisp topping for a warm, autumnal flair.
- Healthier Option: Substitute Greek yogurt for a portion of the cream cheese to create a lighter, tangier cheesecake. You can also use a sugar substitute, such as erythritol or stevia, to reduce the overall sugar content.
- Mini Cheesecakes: Bake individual portions of Apple Crisp Cheesecake in a muffin tin for easy, portion-controlled servings.
The beauty of this recipe lies in its versatility, allowing you to explore different flavor combinations and cater to various dietary preferences.
Serving Suggestions and Pairings
The Apple Crisp Cheesecake is a show-stopping dessert that can be enjoyed in a variety of settings. Whether you’re hosting a cozy autumn gathering, a festive holiday party, or simply treating yourself to a decadent dessert, this cheesecake is sure to impress.
For the ultimate indulgence, consider serving slices of Apple Crisp Cheesecake with a dollop of freshly whipped cream, a drizzle of caramel sauce, or a scoop of vanilla ice cream. The contrast of the creamy cheesecake, the crunchy topping, and the sweet accoutrements is a flavor and texture explosion that will delight your taste buds.
As for beverage pairings, Apple Crisp Cheesecake pairs beautifully with a rich, aromatic cup of coffee or a glass of sweet dessert wine, such as Moscato or late-harvest Riesling. These pairings complement the dessert’s flavors and create a truly indulgent experience.
Frequently Asked Questions (FAQ)
How can I adjust the sweetness of my Apple Crisp Cheesecake?
If you prefer a less sweet cheesecake, you can reduce the amount of granulated and brown sugar in the recipe. Start by decreasing each by 1/4 cup and taste the batter before baking. You can also use unsweetened apples or add a bit of lemon juice to balance the sweetness. For those looking for a sugar substitute, consider using stevia or erythritol, keeping in mind that these can have different sweetness levels compared to sugar, so adjustments may be needed based on taste.
What is the best way to store leftover Apple Crisp Cheesecake?
To store leftover Apple Crisp Cheesecake, cover it with plastic wrap or aluminum foil and refrigerate for up to 5 days. For longer storage, you can freeze the cheesecake. Wrap it tightly in plastic wrap and then place it in an airtight container or a freezer bag. It can be frozen for up to 2-3 months. When ready to serve, thaw it overnight in the refrigerator before enjoying. Be aware that the crisp topping may soften slightly after freezing, but the flavors will still be delicious.
Can I make Apple Crisp Cheesecake in advance, and how should I do it?
Yes, you can make Apple Crisp Cheesecake in advance! It’s best to bake it a day or two before you plan to serve it. After baking, allow the cheesecake to cool completely at room temperature, then refrigerate it for at least 4 hours or overnight to set. For optimal flavor, keep the crisp topping separate until just before serving; you can add it on top after the cheesecake has chilled, ensuring it stays crunchy.
How do I know when my Apple Crisp Cheesecake is done baking?
To determine if your Apple Crisp Cheesecake is done baking, look for a few key signs. The top should be golden brown, and the edges should be set while the center may still have a slight jiggle. Insert a toothpick into the center; it should come out clean or with a few moist crumbs attached, but not wet batter. Be cautious not to overbake, as this can lead to a dry texture. If in doubt, it’s better to underbake slightly, as the cheesecake will continue to set while cooling.
More Related Recipes You Might Enjoy
Conclusion
Indulge in the irresistible harmony of creamy Apple Crisp Cheesecake! This dessert masterpiece combines the rich, indulgent flavors of cheesecake with the warm, comforting notes of a homemade apple crisp. Whether you’re celebrating a special occasion or simply craving a decadent treat, this recipe is sure to impress and delight your taste buds. So, gather your ingredients, preheat your oven, and get ready to savor the ultimate fusion of two beloved desserts. Happy baking!
Looking for more visual inspiration? Follow me on Pinterest, where I share new recipes, dinner tips, and behind-the-scenes kitchen moments every week. Buon appetito!
Print
Indulge in This Amazing Apple Crisp Cheesecake Recipe Today!
- Total Time: 4 hours 20 minutes
- Yield: 12 servings 1x
- Diet: Vegetarian
Description
Indulge in the irresistible harmony of creamy Apple Crisp Cheesecake! This dessert masterpiece combines the rich, indulgent flavors of cheesecake with the warm, comforting notes of a homemade apple crisp.
Ingredients
- 24 ounce cream cheese
- 1 cup granulated sugar
- 1/4 cup all-purpose flour
- 1 teaspoon vanilla extract
- 4 large eggs
- 3 cup peeled and sliced Granny Smith apples
- 1 cup old-fashioned oats
- 1/2 cup brown sugar
- 1/2 cup all-purpose flour
- 1/2 cup unsalted butter, cubed
- 1 teaspoon ground cinnamon
Instructions
1. Preheat the Oven: Set your oven to 350°F and grease a 9-inch springform pan to prepare for the cheesecake.
2. Prepare the Cheesecake Batter: In a large bowl, beat the cream cheese until it’s smooth and creamy. Add the granulated sugar, flour, and vanilla extract, mixing until well combined. Then, one at a time, beat in the eggs, making sure to incorporate each one fully before adding the next.
3. Layer the Apples: Spread the sliced Granny Smith apples evenly in the bottom of the prepared springform pan. Carefully pour the cheesecake batter over the apples, smoothing the top with a spatula.
4. Make the Crisp Topping: In a separate bowl, combine the old-fashioned oats, brown sugar, flour, cubed butter, and ground cinnamon. Use your fingers or a fork to mix the ingredients until they form a crumbly, streusel-like topping.
5. Add the Topping: Evenly sprinkle the crisp topping over the cheesecake batter, ensuring it covers the entire surface.
6. Bake to Perfection: Place the filled springform pan in the preheated oven and bake for 50-60 minutes, or until the top is golden brown and a toothpick inserted into the center comes out clean.
7. Cool and Serve: Allow the Apple Crisp Cheesecake to cool to room temperature, then refrigerate it for at least 4 hours (or overnight) before slicing and serving.
Notes
To ensure your Apple Crisp Cheesecake turns out perfectly every time, consider these helpful tips:
– Cream the Cheese Thoroughly: Take the time to beat the cream cheese until it’s silky smooth, as this will contribute to the creamy texture of the cheesecake.
– Layer the Apples Evenly: Arrange the sliced apples in a single, even layer on the bottom of the pan to ensure they bake consistently and complement the cheesecake layer.
– Crumble the Topping: Use your fingers or a fork to create a delightfully crumbly, streusel-like topping that will bake up crisp and golden brown.
– Don’t Overbake: Keep a close eye on the cheesecake during the baking process, as overbaking can lead to a dry, cracked texture. Remove it from the oven when the center is still slightly jiggly.
– Chill Thoroughly: Allowing the Apple Crisp Cheesecake to chill in the refrigerator for several hours or overnight is crucial for the cheesecake to set properly and develop its signature creamy texture.
- Prep Time: 20 minutes
- Cook Time: 60 minutes
- Category: Dessert
- Method: Baking
- Cuisine: American
Nutrition
- Serving Size: 1 slice
- Calories: 350
- Sugar: 25g
- Sodium: 250mg
- Fat: 20g
- Saturated Fat: 12g
- Unsaturated Fat: 8g
- Trans Fat: 0g
- Carbohydrates: 40g
- Fiber: 3g
- Protein: 6g
- Cholesterol: 100mg