
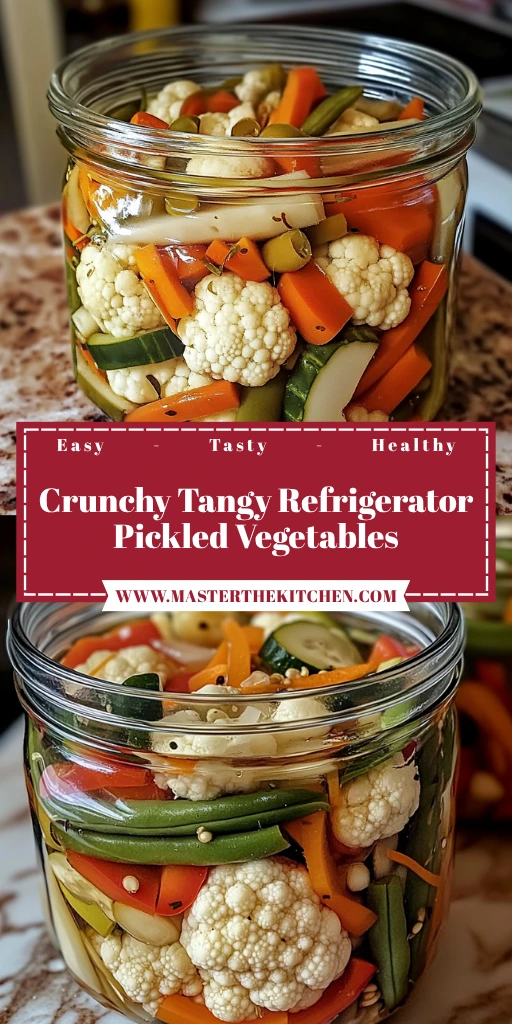
Introduction to Crunchy Tangy Refrigerator Pickled Vegetables
Crunchy Tangy Refrigerator Pickled Vegetables are not only a delightful addition to meals but also a fantastic way to preserve seasonal produce. The pickling process dates back thousands of years, originally developed as a method for food preservation. Ancient civilizations utilized pickling to extend the shelf life of vegetables, enjoying the tangy flavor and added crunch even during off-seasons. Today, this method remains popular, allowing us to savor the flavors of fresh veggies while also providing a long-lasting snack option.
Why opt for refrigerator pickles, you ask? Unlike traditional canning methods, refrigerator pickles are incredibly easy to prepare and don’t require specialized equipment. You simply need fresh vegetables and a simple brine. The result is a fresh, vibrant dish that’s full of flavor, ready to enhance sandwiches, salads, or just to munch on as a snack. Let’s explore how to make your very own Crunchy Tangy Refrigerator Pickled Vegetables with the right ingredients and an easy step-by-step process.
Table of Contents
Ingredients for Crunchy Tangy Refrigerator Pickled Vegetables
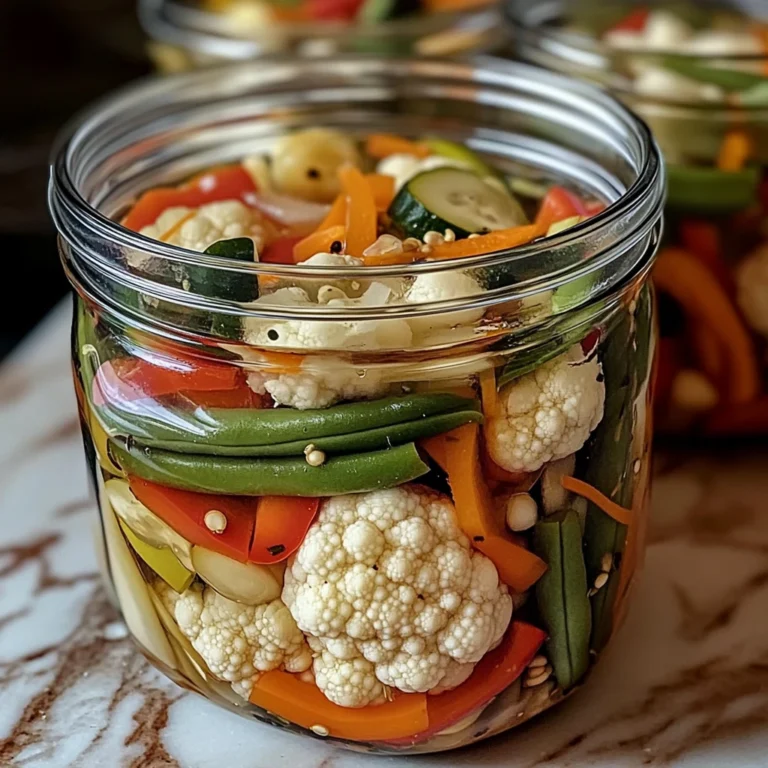
To create the perfect batch of Crunchy Tangy Refrigerator Pickled Vegetables, it’s essential to start with fresh, high-quality ingredients. Here’s what you’ll need:
- 2 cups cauliflower florets
- 1 cup sliced carrots
- 1 cup sliced cucumbers
- 1 red bell pepper, sliced
- 1 cup green beans or other sturdy vegetables
Now, let’s talk about the brine. Each component plays a crucial role in developing that signature tangy flavor:
- 2 cups vinegar
- 2 cups water
- 2 tbsp salt
- 1 tbsp sugar
- 2 tsp mustard seeds
- 1 tsp black peppercorns
- 1/2 tsp red pepper flakes
- 2 to 4 garlic cloves
- Fresh dill, optional
Step-by-Step Instructions for Making Crunchy Tangy Refrigerator Pickled Vegetables
Prep the Vegetables
Begin by washing your vegetables thoroughly under cold water. This step is important to remove any dirt or pesticides that could affect the final taste. Cut each vegetable into uniform, bite-sized pieces or sticks, ensuring they will pickle evenly. Once prepped, pack them tightly into clean, sterilized jars, leaving a little bit of space at the top.
Make the Brine
Next, it’s time to whip up your brine! In a medium-sized saucepan, combine the vinegar, water, salt, sugar, mustard seeds, black peppercorns, red pepper flakes, and garlic. If you’re using dill, add that as well. Heat over medium until it reaches a simmer, stirring occasionally until the salt and sugar completely dissolve. This simmering process helps to blend the flavors together beautifully, creating a deliciously tangy brine.
Pickle the Vegetables
Once your brine is ready, carefully pour the hot mixture over the prepared vegetables in the jars. Make sure the vegetables are fully submerged; you can use a clean utensil to push them down if necessary. It’s important that the vegetables are completely covered to ensure they pickled evenly.
Chill and Serve
After pouring the hot brine over your vegetables, let the jars cool to room temperature. Once cooled, seal them tightly and transfer them to the fridge. For the best flavor and crunch, it’s recommended to let your pickles chill for at least 24 hours. The longer they sit, the more intense the flavors will become, so don’t hesitate to let them marinate a little longer if you can!
Tips for Perfect Pickled Vegetables
Vegetable Combinations
While this recipe highlights some classic vegetables, feel free to get creative! Other great options for pickling include radishes, bell peppers, or even asparagus. The key is to stick with fresh, sturdy vegetables that can stand up to the pickling process.
Adjusting Spice Levels
If you prefer your pickles with a little more kick, don’t hesitate to increase the amount of red pepper flakes. Alternatively, if you enjoy a milder flavor, simply cut back on them. Remember, pickling is all about personal taste!
Storage Tips
For optimal freshness, store your pickled vegetables in the refrigerator in airtight containers. They can last for several weeks but will be tastiest within the first month. Be sure to keep an eye out for any changes in texture or flavor, which could indicate spoilage.
Health Benefits of Pickled Vegetables
Nutritional Value
Crunchy Tangy Refrigerator Pickled Vegetables are not just tasty; they’re also packed with health benefits! Pickled vegetables can provide probiotics, which are known to assist in digestion and promote gut health. Additionally, they retain many of the vitamins found in fresh vegetables, making them a nutritious snack choice.
Low-Calorie Snack Option
If you’re looking for a low-calorie snack or side dish, these pickled veggies fit the bill perfectly. They add crunch and flavor to meals without the excess calories found in dressings or dips.
Potential Drawbacks
While there are many benefits, it’s also important to keep in mind that pickled vegetables can be high in sodium due to the salt content in the brine. If you’re watching your sodium intake, be sure to enjoy them in moderation. Additionally, the acidity from vinegar may not be suitable for everyone, especially those with certain digestive issues.
Related Recipes to Try
- Spicy Jalapeño Chicken with Creamy Sauce
- Jalapeno Popper Twists
- Honey Garlic Chicken and Brussels Sprouts Skillet
- Everything Bagel Cucumber Salad
FAQs about Crunchy Tangy Refrigerator Pickled Vegetables
How can I prevent my pickled vegetables from becoming too soft?
To ensure your pickled vegetables remain crunchy, start by selecting fresh, firm vegetables, as any signs of wilting can lead to softer pickles. Additionally, avoid overcooking the vegetables before pickling; blanching them briefly (just until they are vibrant in color) can help maintain their texture. Finally, ensure the brine is hot but not boiling when you pour it over the vegetables, as this helps in preserving crunchiness without cooking them further.
Can I add sweeteners other than sugar to my pickling brine?
Absolutely! While sugar is commonly used in pickling brine for balance, you can experiment with other sweeteners. Honey, agave syrup, or maple syrup can add unique flavors to your pickles. Just keep in mind that these alternatives may change the taste profile slightly, so adjust the quantity according to your preference. Remember to dissolve the sweetener in the brine thoroughly for even distribution.
What’s the best way to clean and prepare my vegetables before pickling?
Start by rinsing your vegetables under cold water to remove any dirt or residues. For leafy vegetables, such as cabbage or kale, ensure you separate the leaves and rinse them thoroughly. Use a vegetable brush for firm-skinned vegetables like cucumbers or carrots to scrub away any debris. After washing, trim any ends and cut the vegetables into uniform pieces to ensure even pickling. Pat them dry with a clean kitchen towel to remove excess moisture before placing them in the brine.
How can I enhance the flavor of my refrigerator pickles without adding extra ingredients?
To boost the flavor of your refrigerator pickles without extra ingredients, consider adjusting the brine’s steeping time. Allow the brine to cool completely before pouring it over the vegetables, as this can help infuse the flavors more deeply. You can also let the pickles sit in the refrigerator for longer than the recommended 24 hours—up to a week—to develop a more robust flavor. Additionally, consider using a higher quality vinegar or adding a splash of citrus juice for brightness without altering the core recipe.
Conclusion
In summary, Crunchy Tangy Refrigerator Pickled Vegetables are a simple yet rewarding way to preserve fresh produce while adding vibrant flavors to your meals. This easy recipe invites culinary creativity and encourages you to experiment with different vegetable combinations and spices. So, roll up your sleeves, gather those vegetables, and embark on a delightful pickling journey—you might discover a new favorite snack along the way!
Looking for more visual inspiration? Follow me on Pinterest, where I share new recipes, dinner tips, and behind-the-scenes kitchen moments every week. Buon appetito!
Print
Make Crunchy Tangy Refrigerator Pickled Vegetables at Home Today!
- Total Time: 25 minutes
- Yield: 4 servings 1x
- Diet: Vegetarian
Description
Crunchy Tangy Refrigerator Pickled Vegetables are a delightful addition to meals and a fantastic way to preserve seasonal produce.
Ingredients
- 2 cup cauliflower florets
- 1 cup sliced carrots
- 1 cup sliced cucumbers
- 1 red bell pepper, sliced
- 1 cup green beans or other sturdy vegetables
- 2 cup vinegar
- 2 cup water
- 2 tablespoon salt
- 1 tablespoon sugar
- 2 teaspoon mustard seeds
- 1 teaspoon black peppercorns
- 1/2 teaspoon red pepper flakes
- 2 to 4 garlic cloves
Instructions
1. Begin by washing your vegetables thoroughly under cold water. Cut each vegetable into uniform, bite-sized pieces or sticks, ensuring they will pickle evenly. Pack them tightly into clean, sterilized jars, leaving a little bit of space at the top.
2. In a medium-sized saucepan, combine the vinegar, water, salt, sugar, mustard seeds, black peppercorns, red pepper flakes, and garlic. Heat over medium until it reaches a simmer, stirring occasionally until the salt and sugar completely dissolve.
3. Once your brine is ready, carefully pour the hot mixture over the prepared vegetables in the jars. Make sure the vegetables are fully submerged; you can use a clean utensil to push them down if necessary.
4. Let the jars cool to room temperature. Once cooled, seal them tightly and transfer them to the fridge. For the best flavor and crunch, let your pickles chill for at least 24 hours.
Notes
For optimal freshness, store your pickled vegetables in the refrigerator in airtight containers. They can last for several weeks but will be tastiest within the first month.
- Prep Time: 15 minutes
- Cook Time: 10 minutes
- Category: Pickles
- Method: Refrigeration
- Cuisine: American
Nutrition
- Serving Size: 1/2 cup
- Calories: 50
- Sugar: 1g
- Sodium: 800mg
- Fat: 0g
- Saturated Fat: 0g
- Unsaturated Fat: 0g
- Trans Fat: 0g
- Carbohydrates: 12g
- Fiber: 3g
- Protein: 2g
- Cholesterol: 0mg