

Introduction to Easy Chicken Kiev
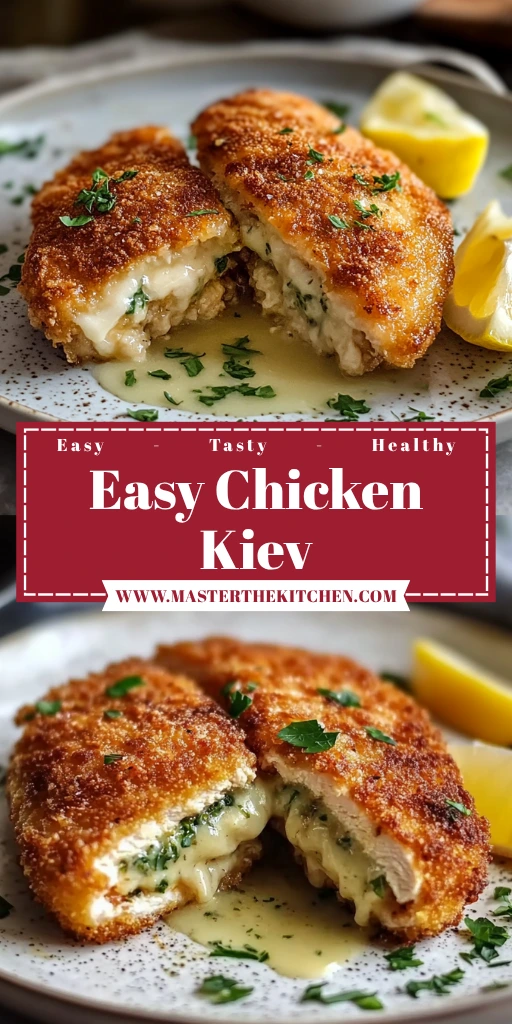
Easy Chicken Kiev is a delectable dish that captures the essence of comfort food with its crispy exterior and herby, buttery filling. Originally hailing from Ukraine, this dish has a rich culinary history that dates back to the early 20th century, when chefs first began to experiment with stuffing chicken breasts. Today, Easy Chicken Kiev is loved worldwide for its convenience and flavorful profile. Unlike traditional recipes that may require extensive preparation, our Easy Chicken Kiev simplifies the process, allowing you to enjoy restaurant-quality food right at home.
This recipe stands out due to its straightforward approach and scrumptious taste. With just a handful of ingredients, you can whip up a meal that’s perfect for special occasions, date nights, or any time you crave that outstanding crunch paired with a melt-in-your-mouth herb butter. In this article, we’ll take you through every step of making this delightful dish, from gathering your ingredients to serving your finished masterpiece.
Table of Contents
Ingredients for Easy Chicken Kiev
To make the best Easy Chicken Kiev, you’ll need the following ingredients:
- 4 boneless skinless chicken breasts (about 1 lb)
- 6 tablespoons unsalted butter, softened
- 2 cloves garlic, minced
- 2 tablespoons fresh parsley, chopped
- 1 tablespoon fresh dill, chopped
- 1 tablespoon fresh chives, chopped
- 1 tablespoon lemon juice
- 1/2 teaspoon salt
- 1/4 teaspoon black pepper
- 1 cup all-purpose flour
- 2 large eggs, beaten
- 2 cups panko bread crumbs
- Vegetable oil, for frying
- Lemon wedges, for serving
Using fresh ingredients is crucial to achieving the best flavor. The combination of herbs like parsley, dill, and chives adds a burst of freshness that complements the rich butter perfectly. If you’re in a pinch, you can substitute fresh herbs with dried, though the flavor won’t be quite as vibrant. For a dairy-free alternative, consider using a vegan butter substitute for the herb butter. This versatility allows you to customize the recipe to suit your dietary needs or preferences.
Preparation Steps for Easy Chicken Kiev
Now that you have your ingredients ready, let’s walk through the steps to create your Easy Chicken Kiev.
Make Herb Butter
Start by making the herb butter. In a mixing bowl, combine the softened butter, minced garlic, parsley, dill, chives, lemon juice, salt, and pepper. Mix until all ingredients are well incorporated. This step is essential for achieving that rich, flavorful filling characteristic of Easy Chicken Kiev.
Shape Butter
Next, transfer the herb butter mixture onto a sheet of plastic wrap. Roll it into a log shape, ensuring it’s tightly wrapped. Place the wrapped log in the refrigerator for at least 15 minutes until it firms up. Chilling the butter helps it maintain its shape when stuffed into the chicken.
Prepare Chicken
While the butter is chilling, prepare the chicken breasts. Lay each breast flat on a cutting board. Using a sharp knife, carefully cut a pocket into the side of each breast—be cautious not to slice through the other side. A good pocket will hold the butter snugly without spilling out.
Fill Chicken
After the herb butter has firmed up, cut it into four equal pieces. Stuff each piece into the pocket of the chicken breasts. Carefully press the opening closed to seal the butter inside. If needed, you can secure the opening with toothpicks to ensure the butter stays put during cooking.
Breading and Frying the Chicken
Setting Up a Breading Station
To make the breading process smooth, set up your breading station. In one shallow bowl, place the flour; in a second bowl, whisk the beaten eggs; and in a third bowl, add the panko bread crumbs. Organizing your workspace in this way will streamline the breading process.
Breading Process
Take each stuffed chicken breast and dredge it in the flour, shaking off any excess. Next, dip it into the beaten eggs, making sure it’s fully coated. Finally, press the chicken into the panko bread crumbs, ensuring that all sides are well covered. This layer will create that signature crispy texture.
Chilling the Chicken
Once breaded, place the chicken on a plate and cover it with plastic wrap. Refrigerate for an additional 15 minutes. This chilling step helps the breading adhere better during frying, resulting in a nicely crispy Chicken Kiev.
Frying the Chicken
Heat about 1 inch of vegetable oil in a large skillet over medium heat until it reaches 350°F (175°C). Carefully place the breaded chicken breasts in the hot oil. Fry for 3-4 minutes on each side, or until they turn a beautiful golden brown and become crispy. Remember to avoid overcrowding the pan, which can lower the oil temperature and lead to an uneven cook.
Baking and Serving Suggestions
Finishing the Cooking Process
Once the chicken is fried and golden, transfer them to a baking sheet. Preheat your oven to 400°F (200°C) and let the chicken bake for 12-15 minutes. This is crucial as it ensures that the chicken is cooked through and reaches an internal temperature of 165°F (74°C).
Letting Chicken Rest
After baking, allow the Chicken Kiev to rest for about 5 minutes before serving. This resting period is essential for juicy chicken, as it lets the juices redistribute so each bite is tender and flavorful.
Serving Ideas
Serve your Easy Chicken Kiev alongside lemon wedges for a zesty kick. Consider pairing it with a fresh salad, roasted vegetables, or fluffy mashed potatoes for a full meal. Presentation can elevate your dish, so arrange the chicken on a platter and garnish with fresh herbs for an appealing look.
Variations and Related Recipes
While this Easy Chicken Kiev recipe is undeniably delicious on its own, there are many variations you might want to explore.
- Different herbs: Feel free to experiment with other herbs like tarragon or thyme for a different flavor profile.
- Cheese-stuffed versions: A splash of your favorite cheese can add a creamy texture if you want to mix things up.
If you’re interested in trying out more delicious recipes, check these out:
- Easy Chicken Bulgogi
- Garlic Parmesan Crusted Chicken Breasts
- Creamy Cajun Chicken Penne Pasta
- Creamy Ground Beef Pasta
Frequently Asked Questions (FAQs)
How can I prevent the butter from leaking out of my Chicken Kiev during cooking?
To prevent the butter from leaking out of your Chicken Kiev, it’s crucial to properly seal the chicken after filling it with the herb butter. First, ensure that the butter is chilled and firm before use, as this helps it hold its shape. After placing the butter in the center of the chicken breast, fold the sides over and tightly roll it up, tucking in the ends. Secure the roll with toothpicks or kitchen twine if necessary. Additionally, chilling the filled chicken before breading can help it maintain its shape during cooking. Frying at the correct temperature (around 350°F or 175°C) will also help, as cooking at too low a temperature can cause the butter to melt out before the chicken is cooked through.
Can I bake Chicken Kiev instead of frying it?
Yes, you can bake Chicken Kiev for a healthier alternative to frying. To do this, preheat your oven to 375°F (190°C). After breading the chicken, place the Chicken Kiev on a baking sheet lined with parchment paper. Lightly spray or brush the tops with oil to help them brown. Bake for about 25-30 minutes, or until the chicken is cooked through and the internal temperature reaches 165°F (74°C). Keep in mind that baked Chicken Kiev may not have the same crispy texture as fried, but it will still be delicious and tender. Consider broiling for the last few minutes to achieve a crispy top.
What can I do if my Chicken Kiev is too dry?
If your Chicken Kiev turns out too dry, there are several ways to enhance its juiciness in the future. Make sure to use boneless, skinless chicken breasts that are not overcooked; use a meat thermometer to check for doneness at 165°F (74°C). Incorporating a flavorful marinade or brine before cooking can help keep the chicken moist. Additionally, consider using chicken thighs instead of breasts, as they tend to be juicier. Lastly, serving Chicken Kiev with a sauce, such as a garlic butter or a creamy herb sauce, can add moisture and flavor to each bite.
How can I make Chicken Kiev gluten-free?
To make Chicken Kiev gluten-free, you can easily substitute traditional bread crumbs with gluten-free alternatives. Use gluten-free panko or crush gluten-free crackers as a coating. Ensure that all other ingredients, including the flour used for breading, are certified gluten-free. Additionally, you can use almond flour or coconut flour as a substitute for all-purpose flour. This way, you can enjoy a delicious gluten-free Chicken Kiev without compromising on taste or texture. Always check labels to confirm that all ingredients are gluten-free, especially condiments or any pre-packaged items.
Conclusion
Easy Chicken Kiev is not only a recipe that’s easy to follow, but it’s also an impressive dish that’s sure to wow your family and friends. With its rich flavors, crunchy exterior, and oozy herb butter, it’s a must-try for anyone looking to elevate their home cooking. Don’t forget to share your experiences and tag friends who would love to enjoy this delightful meal with you. Happy cooking!
Looking for more visual inspiration? Follow me on Pinterest, where I share new recipes, dinner tips, and behind-the-scenes kitchen moments every week. Buon appetito!
Print
Discover the Ultimate Easy Chicken Kiev Recipe for Dinner
- Total Time: 40 minutes
- Yield: 4 servings 1x
Description
Easy Chicken Kiev is a delectable dish that captures the essence of comfort food with its crispy exterior and herby, buttery filling. Originally hailing from Ukraine, this dish has a rich culinary history that dates back to the early 20th century, when chefs first began to experiment with stuffing chicken breasts. Today, Easy Chicken Kiev is loved worldwide for its convenience and flavorful profile. Unlike traditional recipes that may require extensive preparation, our Easy Chicken Kiev simplifies the process, allowing you to enjoy restaurant-quality food right at home.
Ingredients
- 4 boneless skinless chicken breasts (about 1 pound)
- 6 tablespoon unsalted butter, softened
- 2 cloves garlic, minced
- 2 tablespoon fresh parsley, chopped
- 1 tablespoon fresh dill, chopped
- 1 tablespoon fresh chives, chopped
- 1 tablespoon lemon juice
- 1/2 teaspoon salt
- 1/4 teaspoon black pepper
- 1 cup all-purpose flour
- 2 large eggs, beaten
- 2 cup panko bread crumbs
- Vegetable oil, for frying
- Lemon wedges, for serving
Instructions
1. Make Herb Butter: Start by making the herb butter. In a mixing bowl, combine the softened butter, minced garlic, parsley, dill, chives, lemon juice, salt, and pepper. Mix until all ingredients are well incorporated.
2. Shape Butter: Transfer the herb butter mixture onto a sheet of plastic wrap. Roll it into a log shape, ensuring it’s tightly wrapped. Place the wrapped log in the refrigerator for at least 15 minutes until it firms up.
3. Prepare Chicken: While the butter is chilling, prepare the chicken breasts. Lay each breast flat on a cutting board. Using a sharp knife, carefully cut a pocket into the side of each breast.
4. Fill Chicken: After the herb butter has firmed up, cut it into four equal pieces. Stuff each piece into the pocket of the chicken breasts. Carefully press the opening closed to seal the butter inside.
5. Setting Up a Breading Station: In one shallow bowl, place the flour; in a second bowl, whisk the beaten eggs; and in a third bowl, add the panko bread crumbs.
6. Breading Process: Take each stuffed chicken breast and dredge it in the flour, shaking off any excess. Next, dip it into the beaten eggs, making sure it’s fully coated. Finally, press the chicken into the panko bread crumbs.
7. Chilling the Chicken: Once breaded, place the chicken on a plate and cover it with plastic wrap. Refrigerate for an additional 15 minutes.
8. Frying the Chicken: Heat about 1 inch of vegetable oil in a large skillet over medium heat until it reaches 350°F. Carefully place the breaded chicken breasts in the hot oil. Fry for 3-4 minutes on each side.
9. Finishing the Cooking Process: Once the chicken is fried and golden, transfer them to a baking sheet. Preheat your oven to 400°F and let the chicken bake for 12-15 minutes.
10. Letting Chicken Rest: After baking, allow the Chicken Kiev to rest for about 5 minutes before serving.
11. Serving Ideas: Serve your Easy Chicken Kiev alongside lemon wedges for a zesty kick.
Notes
Using fresh ingredients is crucial to achieving the best flavor. The combination of herbs like parsley, dill, and chives adds a burst of freshness that complements the rich butter perfectly.
- Prep Time: 20 minutes
- Cook Time: 20 minutes
- Category: Main Course
- Method: Frying
- Cuisine: Ukrainian
Nutrition
- Serving Size: 1 piece
- Calories: 500
- Sugar: 1g
- Sodium: 600mg
- Fat: 30g
- Saturated Fat: 15g
- Unsaturated Fat: 10g
- Trans Fat: 0g
- Carbohydrates: 35g
- Fiber: 2g
- Protein: 30g
- Cholesterol: 150mg