
Chicken Katsu Musubi: A Delicious Fusion of Flavors
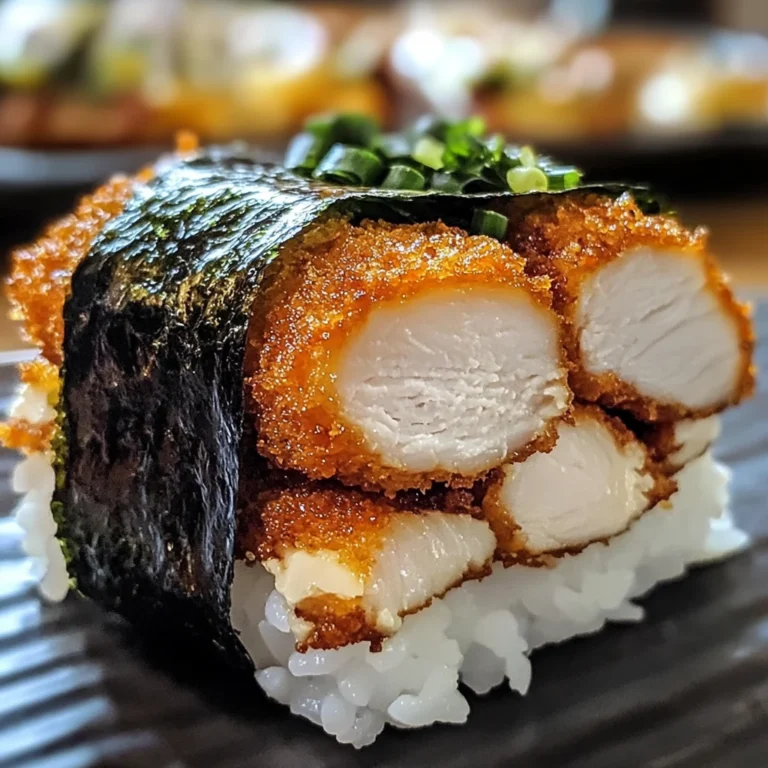
Chicken Katsu Musubi is a delightful blend of Japanese and Hawaiian culinary traditions, earning its popularity among food lovers everywhere. This savory dish marries crispy chicken katsu with sushi rice wrapped in seaweed, creating a portable snack that is both satisfying and flavorful. Whether enjoyed as lunch or a delightful snack, Chicken Katsu Musubi stands out thanks to its unique combination of textures and tastes, making it a must-try for anyone looking to explore Asian fusion cuisine. In this recipe, we’ll walk you through each component, from the chicken to the tonkatsu sauce, ensuring a perfect Chicken Katsu Musubi experience at home.
Table of Contents
Understanding the Key Ingredients
Each component of Chicken Katsu Musubi serves a special purpose, contributing to the dish’s overall flavor and texture. Let’s dive deeper into the essential ingredients.
Chicken Katsu
The star of any Chicken Katsu Musubi is the chicken katsu itself. Using 1 pound of boneless skinless chicken thighs ensures a juicy and tender result. The thighs provide more flavor compared to chicken breasts and are better suited for frying. Additionally, the use of Japanese panko breadcrumbs is crucial, as they add an airy, crispy texture that elevates the dish beyond ordinary fried chicken.
Tonkatsu Sauce
Tonkatsu sauce is a rich, tangy condiment that perfectly complements the crispy chicken. The sauce is made from:
- 3 tablespoons ketchup
- 2 tablespoons Worcestershire sauce
- 1 tablespoon soy sauce
- 1 tablespoon oyster sauce
- 1 tablespoon brown sugar
- 1 teaspoon hot honey
Each ingredient adds depth, sweetness, and a hint of spice, making it an essential element of Chicken Katsu Musubi. Variations of tonkatsu sauce might include tweaking the sweetness or adding garlic for a different twist.
Sushi Rice
For the best Chicken Katsu Musubi, using sushi rice is non-negotiable. The sticky quality of sushi rice holds the musubi together while providing a gentle, chewy contrast to the crispy chicken. To properly season the rice, mix together 2 tablespoons of rice vinegar, 1 tablespoon of sugar, and 1 teaspoon of salt until dissolved, then fold it into the warm cooked rice.
Nori Sheets
Finally, the nori sheets used in Chicken Katsu Musubi are essential for wrapping the rice and chicken. For an authentic experience, use high-quality nori that is specifically meant for sushi. The nori adds umami and a subtle sea flavor to the overall dish.
Preparing the Chicken Katsu
Now that we’ve covered the ingredients, let’s focus on how to prepare the chicken katsu step-by-step.
Step 1: Trim and Slice
Start by trimming any excess fat from 1 pound of boneless skinless chicken thighs. Next, slice the chicken into 3 equal pieces, cutting crosswise. To ensure even cooking, pound each piece to about half an inch thickness using a meat mallet.
Step 2: Set Up Breading Station
Creating a three-step breading station will help achieve that coveted crispy coating:
- Place 1 cup of all-purpose flour in the first shallow bowl.
- In the second bowl, beat 2 large eggs.
- Finally, in the third bowl, pour in 2 cups of Japanese panko breadcrumbs.
Step 3: Breading the Chicken
Now, it’s time to bread the chicken! Dredge each piece in flour, shaking off any excess. Next, dip them in the beaten eggs, allowing the excess to drip off before pressing firmly into panko breadcrumbs, ensuring there are no bare spots.
Tips for the Perfect Crispy Crust
For optimal frying, heat 2 inches of neutral oil in a heavy pot or skillet to 350°F (175°C). Fry the chicken pieces in small batches for 4 to 6 minutes, or until golden brown and the internal temperature reaches 165°F. Drain the cooked katsu on a wire rack to keep them crispy.
Making the Tonkatsu Sauce
While the chicken katsu is frying, let’s prepare the tonkatsu sauce. In a small saucepan, combine ketchup, Worcestershire sauce, soy sauce, oyster sauce, brown sugar, and hot honey, heating gently over low heat. Stir until the sugar fully dissolves, resulting in a smooth, flavorful sauce.
Cooking the Chicken Katsu
Frying the chicken katsu requires precision to achieve that perfect golden color. Monitor the oil’s temperature closely and avoid overcrowding the pan to maintain the heat. After frying, allow the chicken to rest on a wire rack, ensuring it stays crispy.
Assembling the Musubi
Now comes the fun part—assembling your Chicken Katsu Musubi!
Step 1: Lay Out Nori
Place a strip of nori flat on a clean surface, shiny side down. If you have a musubi mold that makes assembly easier, place it in the center of the nori.
Step 2: Layer the Rice and Chicken
Fill the mold with half a cup of seasoned sushi rice and press down firmly, then carefully remove the mold. Brush a small amount of tonkatsu sauce on top of the rice before placing a piece of chicken katsu on top.
Step 3: Wrap and Seal
Fold both sides of the nori over the rice and chicken, pressing firmly to seal the edges. If needed, you can dab a bit of water to encourage the nori to stick. Finally, sprinkle with sesame seeds for garnish!
Serving Suggestions and Pairings
Serve your Chicken Katsu Musubi immediately while the katsu is still crispy. Pair it with additional tonkatsu sauce for dipping and consider serving side dishes like pickled vegetables, a green salad, or even some fresh edamame to complement this satisfying meal. If you’re looking for drink pairings, iced tea or even a cold beer can enhance the flavors.
FAQs About Chicken Katsu Musubi
- Can I use different types of breading for the chicken katsu? Yes, while traditional chicken katsu is made using panko breadcrumbs for a light and crispy texture, you can experiment with other types of breading. For example, you could use crushed cornflakes for a different crunch or seasoned flour for a simpler approach. Just keep in mind that the texture and flavor will change, so choose a breading that complements the overall dish.
- What is the best way to reheat Chicken Katsu Musubi without losing its texture? To reheat Chicken Katsu Musubi while maintaining its crispy texture, the best method is to use an oven or an air fryer. Preheat the oven to 350°F (175°C) and place the musubi on a baking sheet, covering it loosely with foil to prevent over-browning. Heat for about 10-15 minutes until warmed through. If using an air fryer, set it to 350°F (175°C) and heat for 5-8 minutes.
- Can Chicken Katsu Musubi be frozen, and if so, how should I do it? Yes, you can freeze Chicken Katsu Musubi! To do so, assemble the musubi but avoid adding any sauces or toppings that may become soggy upon freezing. Wrap each piece tightly in plastic wrap or aluminum foil and place them in an airtight container or freezer bag. When you’re ready to eat, thaw them in the refrigerator overnight and reheat using the oven or air fryer for the best texture.
- What are some creative variations of Chicken Katsu Musubi I can try? There are plenty of creative variations you can try with Chicken Katsu Musubi! You could substitute the chicken with other proteins like shrimp or tofu for a vegetarian option. Additionally, try adding different fillings such as avocado, pickled vegetables, or even a slice of cheese for a fusion twist. You can also experiment with flavored rice by mixing in furikake or using coconut milk when cooking the sushi rice for a unique taste.
More Related Recipes You Might Enjoy
- One Pan Honey Garlic Kielbasa and Veggies
- Creamy Miso Udon
- Garlic Parmesan Shrimp Fettuccine Bake
- Chicken Penne with Creamy Mushroom and Asparagus
Conclusion
Now that you have mastered the art of making Chicken Katsu Musubi, it’s time to create this delicious dish at home. Whether you enjoy it for lunch, a snack, or a picnic treat, Chicken Katsu Musubi is sure to impress. Don’t hesitate to explore variations and adapt the recipe to suit your taste preferences. Happy cooking!
Looking for more visual inspiration? Follow me on Pinterest, where I share new recipes, dinner tips, and behind-the-scenes kitchen moments every week. Buon appetito!
Print
Experience the Delight of Chicken Katsu Musubi Today!
- Total Time: 50 minutes
- Yield: 4 servings 1x
Description
Chicken Katsu Musubi is a delightful blend of Japanese and Hawaiian culinary traditions, earning its popularity among food lovers everywhere. This savory dish marries crispy chicken katsu with sushi rice wrapped in seaweed, creating a portable snack that is both satisfying and flavorful.
Ingredients
- 1 pound boneless skinless chicken thighs
- 3 tablespoon ketchup
- 2 tablespoon Worcestershire sauce
- 1 tablespoon soy sauce
- 1 tablespoon oyster sauce
- 1 tablespoon brown sugar
- 1 teaspoon hot honey
- 1 cup all-purpose flour
- 2 large eggs
- 2 cup Japanese panko breadcrumbs
- 2 tablespoon rice vinegar
- 1 tablespoon sugar
- 1 teaspoon salt
- 2 sheets nori
Instructions
1. Trim any excess fat from the chicken thighs and slice into 3 equal pieces. Pound each piece to about 1/2 inch thickness.
2. Set up a breading station with flour in one bowl, beaten eggs in another, and panko breadcrumbs in a third.
3. Dredge each piece of chicken in flour, dip in eggs, and coat with panko breadcrumbs.
4. Heat 2 inches of neutral oil in a pot to 350°F. Fry chicken pieces for 4 to 6 minutes until golden brown and cooked through.
5. For the tonkatsu sauce, combine ketchup, Worcestershire sauce, soy sauce, oyster sauce, brown sugar, and hot honey in a saucepan over low heat until sugar dissolves.
6. Assemble musubi by placing nori on a surface, adding seasoned sushi rice, a piece of chicken katsu, and folding nori over to seal.
7. Serve immediately with additional tonkatsu sauce for dipping.
Notes
For optimal frying, monitor oil temperature closely and avoid overcrowding the pan. Allow fried chicken to rest on a wire rack to maintain crispiness.
- Prep Time: 20 minutes
- Cook Time: 30 minutes
- Category: Main Dish
- Method: Frying
- Cuisine: Japanese-Hawaiian
Nutrition
- Serving Size: 1 musubi
- Calories: 400
- Sugar: 8 grams
- Sodium: 600 milligrams
- Fat: 20 grams
- Saturated Fat: 3 grams
- Unsaturated Fat: 15 grams
- Trans Fat: 0 grams
- Carbohydrates: 40 grams
- Fiber: 1 gram
- Protein: 25 grams
- Cholesterol: 150 milligrams